PUBLISHING YOUR WEBSITE
Go Live, Publish, and Set Up Your Domain
Your site's domain is like its street address; it lets other people find it. Setting up your site domain is very important as it allows people to visit your sites. While our site builder does not host your domains, you can purchase a domain and connect it to your published site by creating a CNAME and two A records in your DNS settings.
Go Live
Taking your site live requires publishing your site, setting up your domain, and setting up your domain through your domain host.
Publish a Site
For your site to show up at any domain, you first need to publish it. To publish your site:
- In your editor, on the top right, click Publish. If your site was previously published, click Republish.
- A payment page appears. Select a plan, and continue.
Set up a Domain
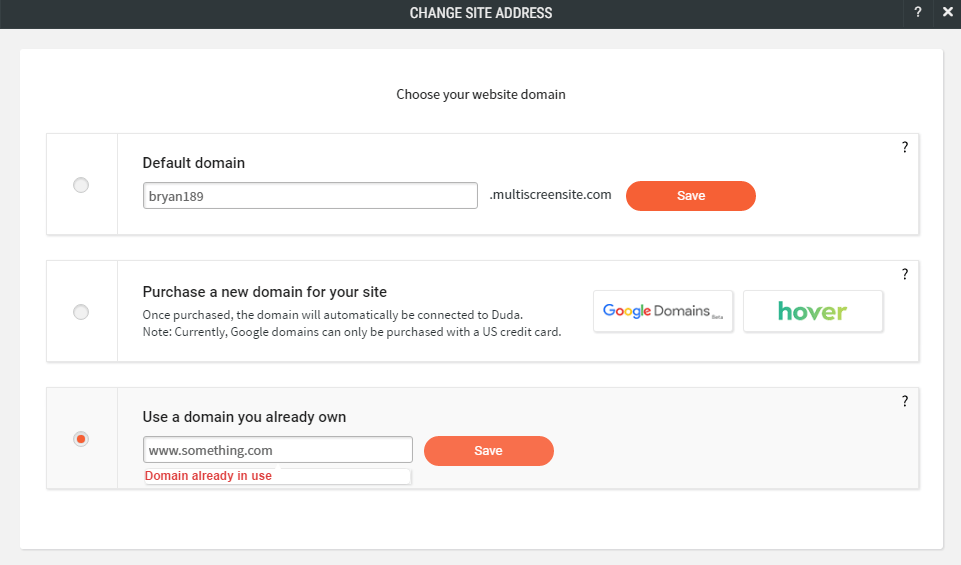
After a site is published, you are prompted to select from one of the following three domain options:
- Default Domain. This is a domain hosted by Website Builder, and is not good for your site’s SEO. The URL will be a subdomain of Website Builder’s with your custom naming. You may use the original default domain.
- Purchase a new domain for your site. Purchase a domain from Google Domains or Hover. When you type your domain into the field, a menu appears with suggestions. This domain will already be set up to work with Website Builder. For more detailed instructions, see Purchase a Custom Domain.
- Use a domain you already own (make sure you added "www." to the URL). You may use a domain that you already own from the domain host you purchased it from. Ensure you add "www." to the URL. If you choose to use your own domain, continue to Go Live, Publish, and Set Up Your Domain.
Note
To change your domain at any time after publishing your site, in the left panel, click Settings, Site URL, and then click Change site URL.
Set up your Domain in your Domain Host
If you chose to use the Default Domain or to Purchase a new domain for your site, you do not need to set up your domain with your domain host.
After setting up your domain in Website Builder, you must set up your DNS settings through your domain host. In order to do this, you will need admin access to the domain which you intend to use. In your domain host, you need to create two A records and a CNAME record.
Note
Some domain hosts will not allow you to set up multiple records for the @ domain. If this is the case for your domain host, then simply add one record for the @ domain and include both IP addresses.
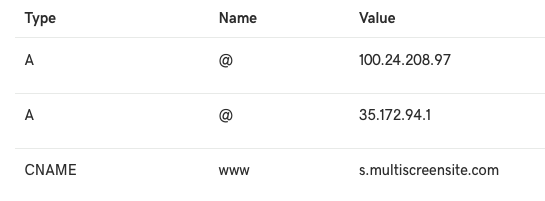
Use the following information for the CNAME record and A records:
CNAME
- Host. www
- Points to. s.multiscreensite.com
A Records
- First A Record:
- Host/Alias. @
- Target/Destination. 35.172.94.1
- Second A Record:
- Host/Alias@
- Target/Destination. 100.24.208.97
Two A Records are used for server balance and redundancy.
Note
If you previously took your site live with instructions involving a 301 Redirect and CNAME, you will need to re-create your SSL certificate. For more information, see Add SSL or HTTPS. In addition, you will need to remove the previous settings for the 301 Redirect.
Examples
The following is an example from Google Domains, in which they use one A record with two IP addresses:
Note
Most domain hosts have instructions on creating CNAME records and A records in their help center. If you cannot find this information, you must contact your domain host.
Troubleshooting
CNAME and A records can take up to 48 hours to propagate, so your site will not usually show up immediately. If your site still is not showing up after 48 hours, something is probably wrong. To figure out what is going on:
- Go to https://www.whatsmydns.net/ and select either CNAME or A from the drop-down menu.
- For CNAME, complete the field using your whole URL (for example, www.example.com).
- For the A Record, complete the field using the naked domain (for example, example.com).
- If you see red Xs, or do not see the correct host to the right of each location, this means that either the CNAME or A record was not set up correctly or the domain host is not propagating.
- Ensure the CNAME and A record is set up with the correct values listed above.
- If everything is set up correctly and you have waited 48 hours, but your site is not showing, please contact your domain host for more information.
- If you see green check marks and the correct host name, your CNAME and A record has been set up successfully.
Common Errors
Your Domain is Not Set Up Correctly
This error means either that:
- Your domain is not set up and/or propagated appropriately.
- To resolve this, please make sure you have followed the steps in this article and wait up to 24 hours.
- We are expecting a different domain name.
- To resolve this, make sure that the site URL in this interface has a www before it.
Domain Already In Use
This error means that another site in our system is using this domain. To resolve this, if another site in your account uses this domain, go edit that site and change its assigned domain. If no other sites in your account use this domain, please:
- Log in to your domain host and create a TXT record with the name value 'domainverification' and have its text value be 'proofofdomainXX-XX-XX' (where XX-XX-XX is the date). This will demonstrate that the domain's owner (you) is requesting the change.
- Contact our support team to explain the problem so that we can free up the domain for your use.
Purchase a Custom Domain
Use a custom domain (for example, www.yoursite.com) to make it easy for customers to find your site. If you do not already own a domain name, you need to purchase one to connect to your site. A custom domain puts your brand front and center, making your site more memorable to visitors and allowing you to set up additional security measures for your site.
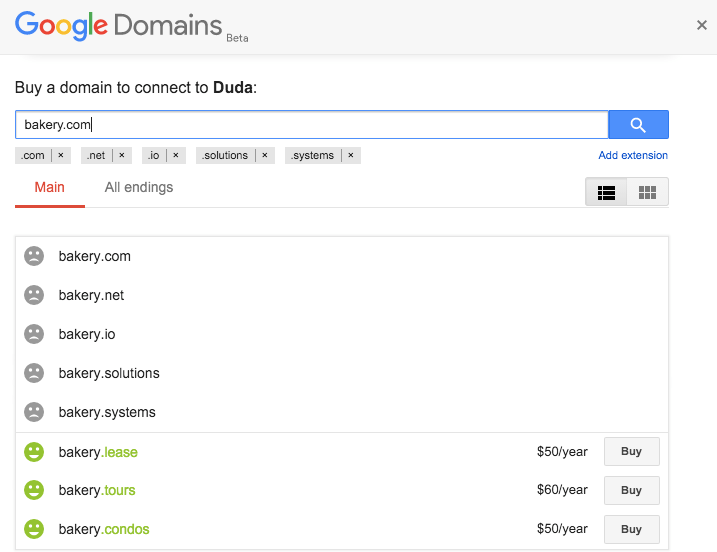
Purchase a Domain with Google Domains
Through our integration with Google, you can opt to purchase a domain within the editor. When you purchase your domain this way, Google automatically configures the domain settings to work with your new responsive site. There is no need to configure CNAME records or 301 redirect setup for domains purchased through the Google/Website Builder integration.
To publish a site and purchase a domain with Google domains:
- In your editor, at the top right, click Publish.
- Click Change Site Address.
- Select Purchase a new domain for your site, and then click Google Domains.
- Purchase your domain from Google.
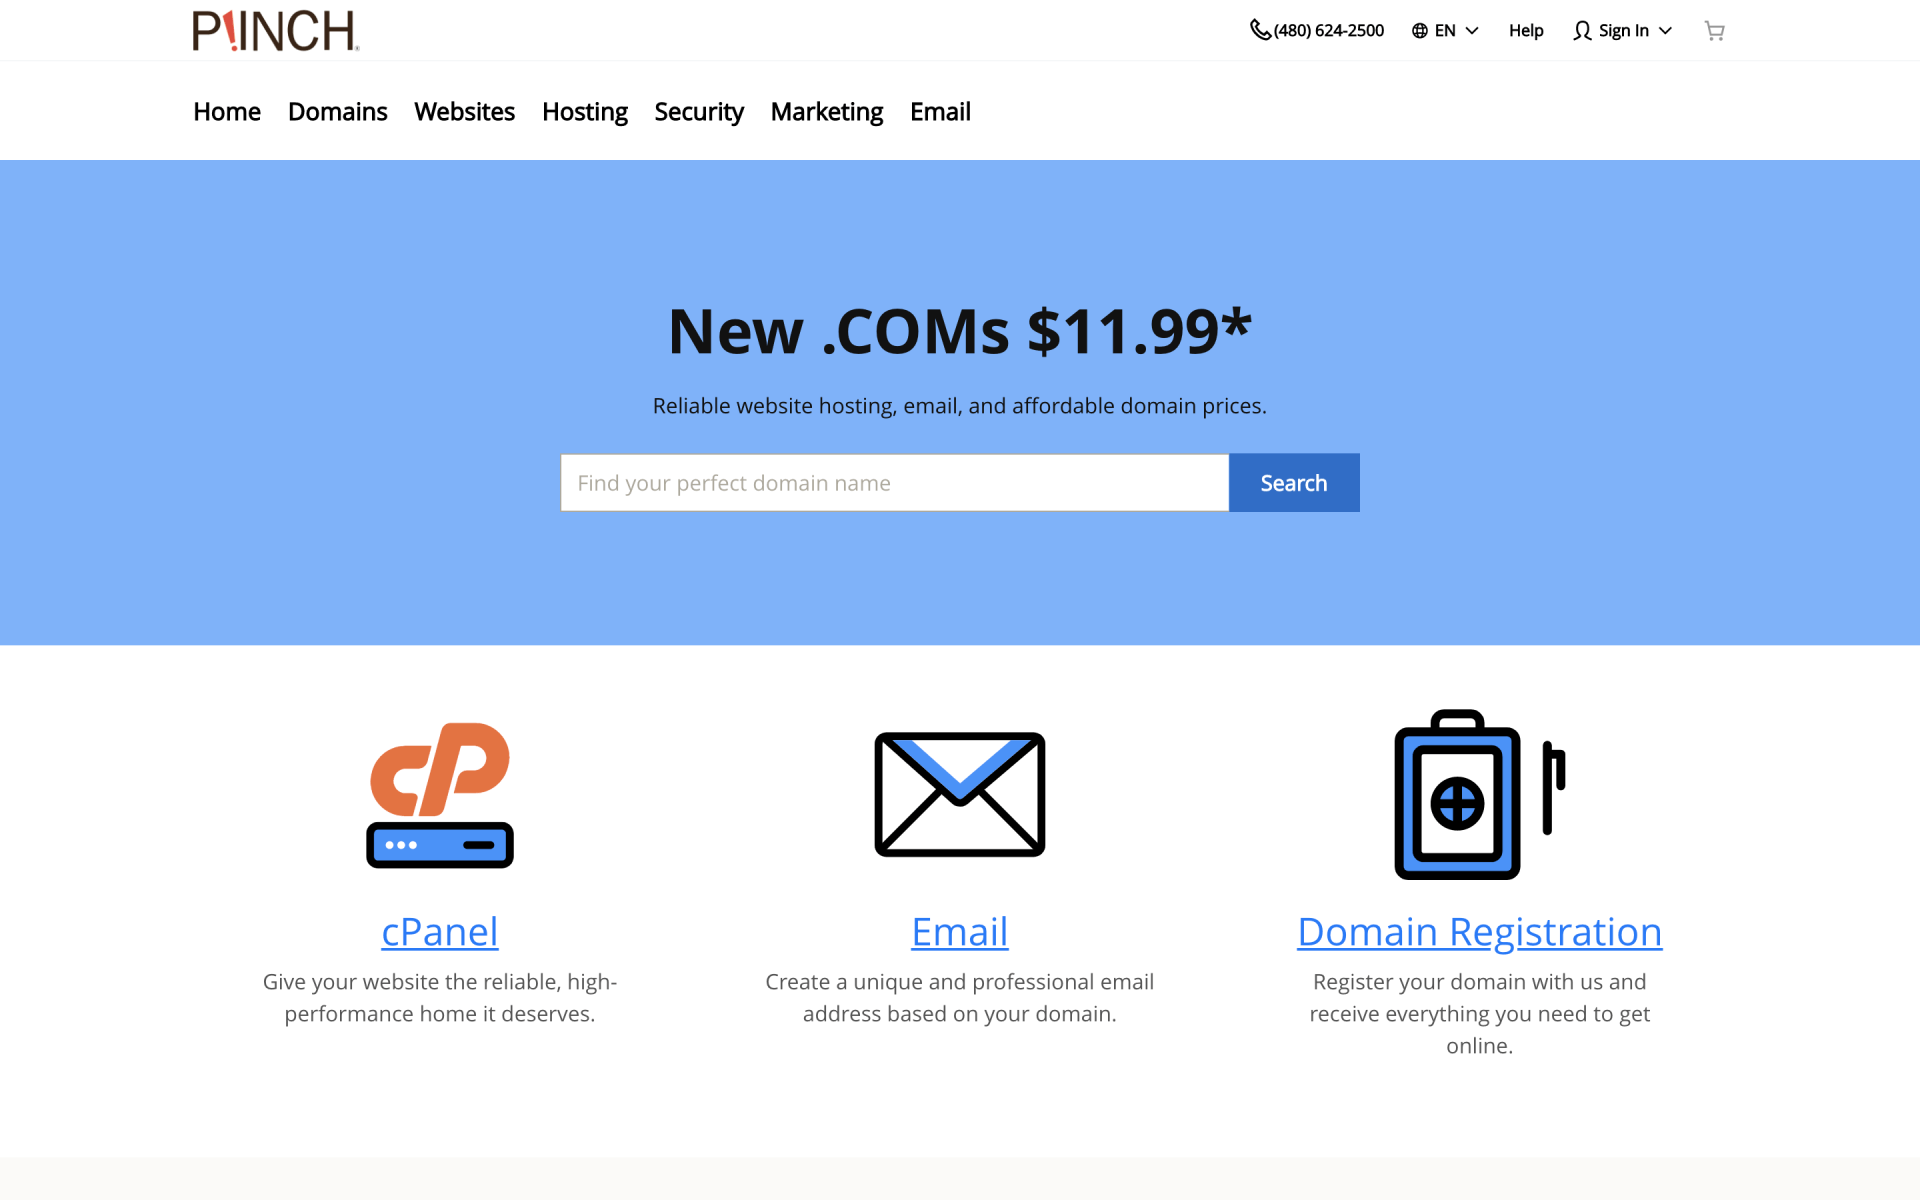
Other Domain Registrars
While we strongly recommend buying your domain from the editor, you can purchase your new domain name from any domain registrar (for example, GoDaddy.com).
When you purchase your domain from a different registrar, you need to follow additional steps to connect the domain to your website. For more information, see Go Live, Publish, and Set Up Your Domain or check out the domains section for specific instructions for your provider.
Note
A custom domain name is not required to view your site. You can publish your site using the default domain (for example, yoursite.multiscreensite.com).
When choosing a registrar, make sure the registrar you choose supports CNAME records and 301 redirects.
If you already own a domain, you can connect it to your site by following the instructions here.
Forward Multiple Domains to Your Site
After a custom domain has been set up for your site, you can forward other domains you own to the domain you set up. This feature may be useful if you have recently changed your domain name or would like to forward other top-level variants of your domain (for example, .net, .org) to your main site.
After setting up a custom domain for your site and waiting for it to propagate, in the left panel, click Settings, and then click Site URL.
To forward multiple domains to your site:
- In the left panel, click Settings, and then click Site URL.
- In the Site URL section, click the link and type the URLs of each of the domains you want to forward to your site, separated by commas. For example, www.mysite.com, www.anothersite.com, www.myorg.org.
- Click Save.
You also need to create the appropriate CNAME records for each of the domains before they will forward to your site. For more information, see Go Live, Publish, and Set Up Your Domain.
Note
There is an option to display the site at alternate domains instead of redirecting. We do not recommend checking this option, as it is likely to reduce your site's overall SEO rankings.
Unpublish a Site
Unpublishing your site will make it no longer visible on the internet. While the site will no longer be publicly visible, you will still be able to make edits to your site and your site subscription payment will continue. You can republish your site at any time to make it live and publicly available.
To unpublish your site:
- In the left panel, click Settings.
- Click Site URL.
- Click Unpublish.
It is important to note that un-publishing a site does not mean that the premium subscription has been canceled. Please make sure to downgrade the subscription of the site if you are no longer planning to use it.